Nearly every classroom on campus has been outfitted with some form of microphone and camera for the remote learning needs that we face this fall.
While the hardware does vary some room to room, most will tend to work in a similar way. For the most part, we suggest only that you test audio and video, as detailed in part of the above instructional video .
Recognizing the Hardware in Your Classroom
Since there are a few different models, it is important that you know what hardware is available in your classroom for video and audio capture.
Logitech C930e
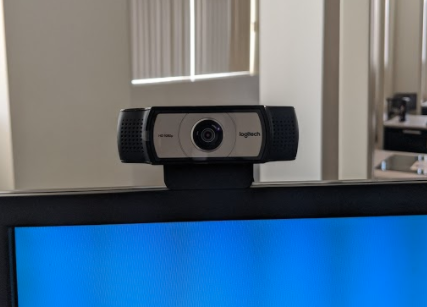
This model is a webcam/mic that connects to the computer via USB. It can be mounted on the monitor, or set up in some other positions by adjusting the plastic stand underneath it. As with most cameras in our classrooms, the C930e is essentially “plug and play”, meaning that outside of ensuring that it’s set as your source there really shouldn’t be anything else technical to account for when using it.
HoverCam Solo 8
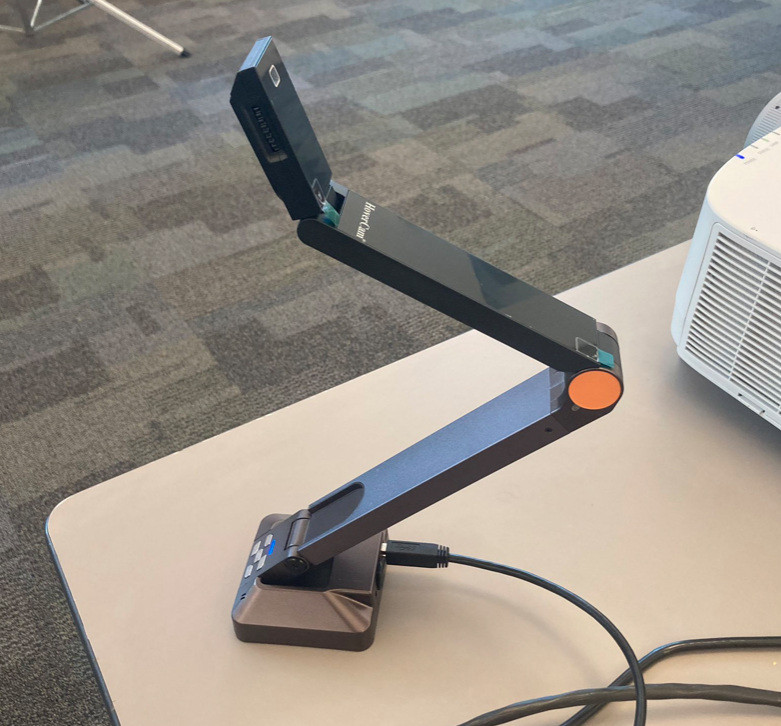
The HoverCam Solo 8 may look like a document camera, but it can in fact also be used for videoconferencing and lecture capture with its built in camera and mic.
The Solo 8 has three points of joint articulation, as well as a rotatable head. We’ve also supplied 15′ USB cables, so you should have plenty of slack to reposition these to point where you need them- be that at the front of the room for the instructor, toward the class for Q&A sessions with remote guest speakers, at the whiteboards to capture formulas you’re writing… you should have plenty of flexibility with these.
Additionally, each room with a HoverCam 8 should also have a piece of software on it called Flex 11. This has some additional features, such as a digital whiteboard and a picture in picture mode for multiple cameras. It can be used on its own to record video, or it run in conjunction with Zoom via Zoom’s sharing features.
HoverCam Ultra 8
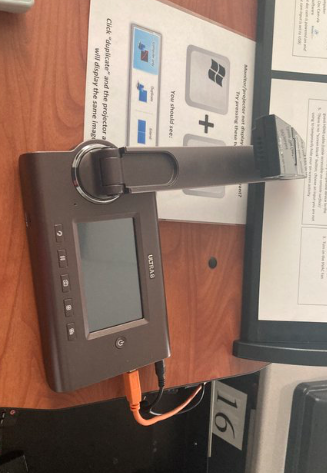
The Ultra 8 is slightly larger than the Solo 8, but looks and functions similarly. Sometimes, particularly in rooms with larger consoles, the HoverCam Ultra 8 may be inside the drawers, so be sure to check in there!
You may notice that unlike the Solo 8, the Ultra requires power in addition to USB. It also has a small screen built into its base.
Due to its slightly more robust nature, the Ultra 8 has some settings that may cause issues if changed. Specifically, you’ll want to ensure that the source is set to USB, since that is the cable that communicates with the computer that you’ll use to run Zoom or the Flex 11 software.
To set this, click on the source icon, circled here (it’s a touch screen):
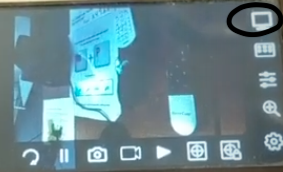
Then simply ensure that USB is the selected source. In this case, by the green checkmark you can see that VGA is the selected source- that would likely be the root of the problem in this example!

Permanent Lecture Capture Hardware
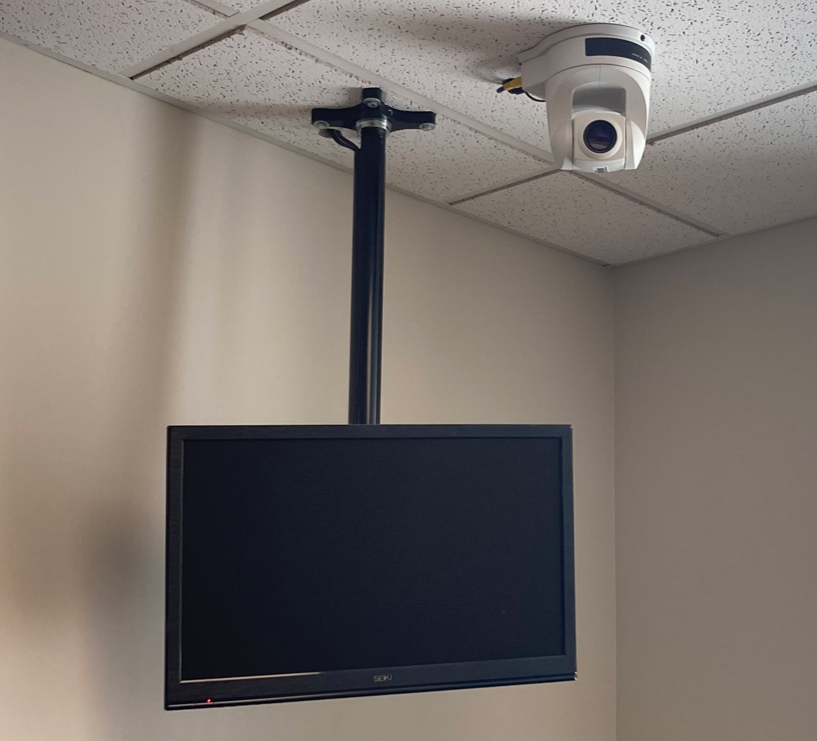
Some rooms have been set up with permanent lecture capture capability.
You’ll recognize these rooms if they have a camera and mic mounted on the ceiling or podium, as well as possibly a confidence monitor.
In these cases, the lecture capture technology will work as it used to, though you can certainly use it for video conferencing via Zoom as well!
Questions and Concerns?
If you still aren’t sure what type of hardware is in your classroom, if you’re not sure how to use it, or if you think the camera is broken or missing, please contact either Learning Technologies at ltt@truman.edu or your building’s support technician.